最近職場で『Linux上で動作するネットワーク機器・サーバー機器の監視ソフトがどんなもんだか検証してみて』ということで、とりあえずVineLinux 5.2上でXymonをインストール・設定します。
Xymonとは、もともとBigBrotherという監視ソフトの拡張モジュールから派生されたソフトで、以前はhobbitという名前で用いられていました。
Xymonは「シモン」と言うらしいです。(サイモンという呼び方をしているところもあるようですが、はてさて・・・。)
VineLinux 5.2をインストール後、Xymonをインストールする前に必要なライブラリ等を事前にインストールしておきます。
[ xml2 / pango / pcre をインストールします]
apt-get install libxml2-devel pango-devel pcre-devel
[fpingをインストールします] apt-get install fping
次に、Xymonのグラフ作成に使用するため、rrdtoolsをインストールします。
こちらはソースをダウンロードしてきて、makeします。
[rrdtoolsのダウンロード]
http://oss.oetiker.ch/rrdtool/pub/rrdtool-1.4.5.tar.gz
# tar xzf rrdtools-1.4.5.tar.gz # cd rrdtools-1.4.5 # ./configure # make install # make site-perl-install
次に、Xymonをダウンロードして、makeします。
事前にユーザを作成したり、準備が必要だったりします。
[Xymonのダウンロード先]
http://sourceforge.net/projects/xymon/
[xymonというユーザを作成しておく] # useradd xymon
[configureを実行する]
# ./configure

[質問を聞いてくるので入力する。私はほとんどdefaultにして、apacheのユーザのみ変更]
What userid will be running Xymon [xymon] ? (Enter)

Where do you want the Xymon installation [/home/xymon] ? (Enter)

What URL will you use for the Xymon webpages [/xymon] ? (Enter)

Where to put the Xymon CGI scripts [/home/xymon/cgi-bin] ? (Enter)
(Note: This is the filesystem directory - we will get to the URL shortly)

What is the URL for the Xymon CGI directory [/xymon-cgi] ? (Enter)
(Note: This is the URL - NOT the filesystem directory)

What is the URL for the Xymon Administration CGI directory [/xymon-seccgi] ? (Enter)
(Note: This is the URL - NOT the filesystem directory)

What group-ID does your webserver use [nobody] ? apache

Where to put the Xymon logfiles [/var/log/xymon] ? (Enter)

What is the name of this host [localhost.localdomain] ? (Enter)

What is the IP-address of this host [127.0.0.1] ? (Enter)

Where should I install the Xymon man-pages (/usr/local/man) ? (Enter)

(この後、configureでSSLに関するlibがないとwarningがでるが続行可能)
[configureが通ったら、makeする]
# make
# make install
Apacheの設定は、ファイルをコピーして設定できます。
[hobbit-apache.confファイルをコピー]
cp -p /home/xymon/server/etc/hobbit-apache.conf /etc/httpd/conf.d/hobbit-apache.conf
Linux起動時にXymonを起動してもらうようにするには、以下のようにします。
(xymonのサイトを参考に。この方法はchkconfigで設定できないので注意。)
[init.dにhobbitというファイルを作成する]
# cd /etc/rc.d/init.d/
# vi hobbit
[hobbit] #!/bin/sh HOBBITHOME=/home/xymon/server case "$1" in start | stop | restart ) [ -x $HOBBITHOME/hobbit.sh ] && \ su - hobbit -c "$HOBBITHOME/hobbit.sh $1" > /dev/null && \ echo -n ' XymonServer' ;; *) echo "Usage: `basename $0` {start|stop|restart}" >&2 ;; esac exit 0[chmodしてあげます] # chmod +x hobbit[runlevelごとに、起動できるよう適宜設定] # cd /etc/rc.d/rc3.d (X使う人は rc5.dにも) # ln -s ../init.d/hobbit S86hobbit
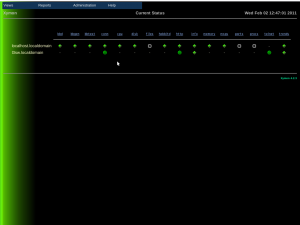
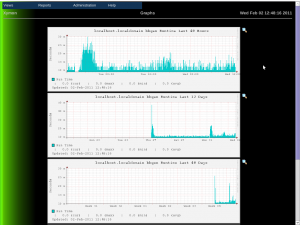
その後、Apacheを起動して、xymonユーザで ./server/hobbit.sh を起動してしばらくすれば下図のようにページが表示できると思います。
私のデフォルト設定では、http://127.0.0.1/xymon で表示できました。

[Xymonトップページの様子]

[Xymonサーバ(bbgen)の稼動グラフ]
あとは、これを元にdevmonとかでsnmpの監視とかもしたいですね。
